
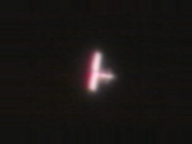
A raw image taken directly from the camera.
The night from May 30th to May 31st, 2001, was an all-nighter for me. Three consecutive passes of the space station ISS, and I had just repaired my laptop; this meant I had to get some new images of our outpost in space. In addition, I had just seen some images that surpassed the quality of my previous pictures by far, and nothing goes over a little friendly competition!
The first two passes saw some nice results, but nothing special compared to what I had already achieved. The third pass proved to be special, though. It started with a solar panel flare that I managed to capture on video beautifully (the station brightened to about -5m). After I finished my last video at a bit past 4AM local time, I packed up my gear and fell into bed. With an exam the next day and lots of sleep to catch up on, I didn't touch the videos until about 36 hours later.
And indeed, aside from the flare, the third and last video looked very promising. Aside from the fact that I had managed to keep the station on the CCD chip on about 5-10% of the frames (an amazing feat considering that I was tracking the station using the 90mm refractor's finderscope!), a whole bunch of images from near the middle of the pass showed a regular "fuzz" around the modules of the station - what could this be?
Barely visible in this still image, the fuzz deserved further investigation (it was clearly a station feature, as it showed up repeatedly in the original video, where it was also easier to see because the pictures were "moving"). The best way to get detail out of video images is to stack several of them (preferably ones that are already of excellent quality) and then sharpen them.
Twenty frames were good enough and showed little motion of the station (the station appears to "turn" because its angle relative to the viewer changes). With the help of AstroStack, they were aligned and averaged.
The next step would be to sharpen this image in a graphics program. In my case, the choice is Adobe Photoshop's "unsharp mask" function, but other programs provide similar sharpening algorithms. The only problem with sharpening is that bright portions of the image tend to get washed out. Normally, this can be compensated by darkening the entire image.
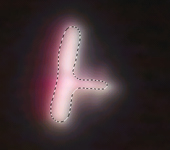
However, darkening this image makes the faint details disappear, exactly the opposite of what I want to do! The goal, therefore, is to darken only the bright portions of the image, which is done with the "lasso" in Photoshop. The lasso allows the user to select a certain part of an image with any shape he chooses. In this case, the bright main modules and solar panels are selected. Doing this with a very small image is very difficult, as the space station is only a few pixels in size.
In order to have a larger image to work with, the picture is enlarged about five to ten times. Then it is possible to choose the bright portion we want to darken. After the selection has been defined, it is feathered about 10 pixels, so that the brightness adjustment fades off gradually at the edge of the selection (otherwise, the edge would be visible as a hard difference in brightness).
Now, the brightness of the selection can be turned down until it is almost as dark as the faint extremities of the station. Making it too dark can result in loss of details, but with a little experimentation, the best brightness value can be found.
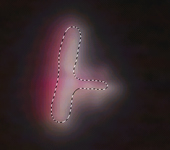
After all parts of the station have nearly the same brightness, we can select the entire image again, and apply the unsharp mask. The more images have been stacked, the stronger the unsharp mask can be and the more details appear. In this case, the strength was set to nearly 500% (all the way to the right) and the radius to about 7 pixels.
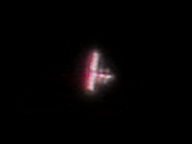
Finally, after the image looks as good as possible, it is best to reduce the image back to the original size. The results are unbelievable! Details that were almost invisible in a raw image from the camera are now clearly visible - an ordinary image becomes extraordinary with a few minutes of work!

![]()